Your Arduino can print a pH value every second and still be wrong if the probe was stored badly, the calibration was skipped, or a pump is injecting electrical noise into the water. A pH probe with embedded interface circuit measures hydrogen-ion activity as pH, while the circuit conditions the probe's very small signal and exposes readings to a microcontroller over UART or I2C. This guide focuses on logging and learning in a small hydroponics or water-monitoring project; it is not drinking-water, food, medical, or compliance advice.
This article is part of the computer hardware technology guide library.
Key takeaways
- The physical probe and the embedded interface circuit are different parts: the probe senses the solution, while the circuit handles high-impedance signal conditioning and digital communication.
- Calibration is a procedure using known buffer solutions; it is not a substitute for cleaning, correct storage, or replacing an ageing probe.
- Temperature compensation needs a real temperature input or a defensible measured temperature. It does not mean the pH circuit can infer temperature from the pH probe alone.
- Pumps, solenoid valves, and nearby probes can create electrical noise. Isolation may be an optional external component, but it can be important in a multi-sensor build.
What a pH probe with embedded interface circuit actually contains
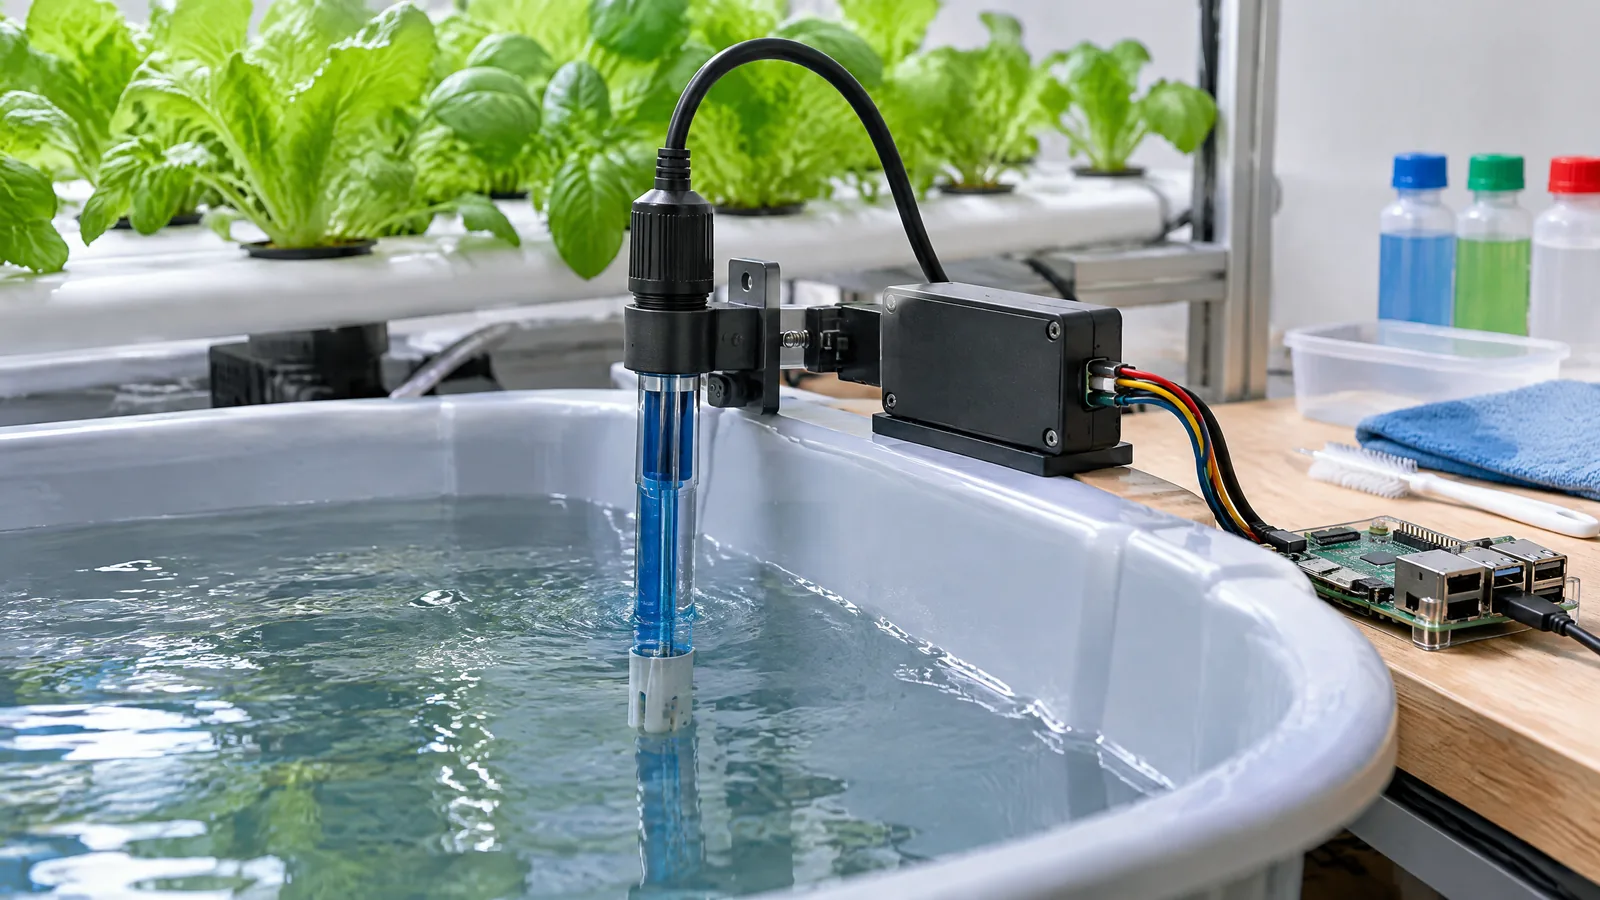
A pH probe is the physical electrochemical sensor that contacts the liquid. Its output is a small, high-impedance signal, so it is not like a typical three-wire analogue sensor that can be connected casually to an Arduino ADC. The embedded interface circuit is a separate signal-conditioning and communications board. Atlas Scientific describes its EZO-pH circuit as compatible with pH probes and provides UART and I2C data protocols, but that board is not the chemical sensing element itself.
This distinction matters when choosing parts. You need a compatible pH probe, the interface circuit, a stable power arrangement, and a microcontroller or single-board computer. A carrier board, USB adaptor, temperature sensor, calibration buffers, and electrical isolator may be optional or model-specific rather than part of the physical pH sensor. Do not assume a product listing that says “pH sensor” includes all of them.
The supplied EZO-pH documentation lists a 3.3–5 V operating range, UART and I2C communication, a default I2C address of 99 (0x63), and a one-reading-per-second response specification. Treat those figures as the claims for that interface circuit, not universal properties of every pH probe or every breakout board.
How to connect the circuit to Arduino or Raspberry Pi
Start with the interface circuit's wiring diagram and datasheet for the exact revision. In I2C mode, the microcontroller needs the circuit's power, ground, SDA, and SCL connections, with voltage levels that are safe for the host board. In UART mode, connect the circuit's transmit and receive lines as the host requires, and confirm the baud-rate and logic-level details before powering the system. A Raspberry Pi sample guide from Atlas Scientific documents USB, I2C, and UART approaches, so the choice is an interface decision rather than a claim that every Pi model exposes identical serial behaviour.
A good first log records the timestamp, pH reading, water temperature if available, calibration state, interface mode, and any event such as a pump switching on. Store raw readings before smoothing them. A moving average can make a chart easier to read, but it can also hide a wiring fault or a sudden change in the water. Keep the raw value available for diagnosis.
Do not wire a dosing pump or automatic control loop simply because the interface can report pH. This article covers observation and logging. Any chemical dosing, closed-loop control, or safety-critical use needs a separate engineering review, independent measurements, and safeguards appropriate to the application.
- Check the probe connector and interface pinout against the exact documentation.
- Power the interface within its documented range and keep signal and power wiring tidy.
- Select UART or I2C deliberately; do not mix command examples from one mode with the other.
- Record raw readings and temperature alongside timestamps before adding filtering.
pH sensor Arduino calibration: a repeatable process
Calibration maps the probe's present electrical response to known reference solutions. The interface documentation supports one-, two-, and three-point calibration modes. The right number of points depends on the range and accuracy you need, the probe instructions, and the buffers available. A beginner project should follow the probe and circuit manuals rather than copying a command from a different board.
Use fresh, identified calibration buffers in clean containers. Rinse the probe as directed between solutions, avoid carrying one buffer into the next, and wait for the reading to settle before accepting a point. Keep the calibration temperature and the solution temperature in your log. A calibration command only changes the interpretation of the signal; it does not clean a contaminated junction or restore a probe that has dried out.
After calibration, check the result in a separate reference portion or with a second trusted instrument when the project decision matters. Do not present a hobby logging setup as a laboratory or regulatory measurement system. If the value drifts, jumps to an extreme, or responds very slowly, investigate probe condition, connections, temperature, buffers, and electrical interference before changing calibration points repeatedly.
- Prepare the required buffer points and note their labels and expiry or preparation status.
- Rinse and handle the probe according to its manufacturer instructions.
- Apply the documented calibration commands for the selected UART or I2C mode.
- Save the date, buffer points, temperature, and interface settings with the calibration record.
- Recheck stability in a separate sample before trusting a long unattended log.
Temperature compensation is useful, but it is not magic
pH readings vary with temperature because both the electrochemical response and the chemistry of the solution are temperature-dependent. The EZO-pH circuit supports temperature compensation, but the system still needs a temperature value supplied by a suitable temperature sensor or entered through the documented interface. The pH probe itself should not be treated as a general-purpose water-temperature sensor unless its own documentation explicitly says so.
For a useful log, place the temperature sensor where it represents the same water as the pH probe and record both values together. If the temperature sensor is external, mark it as an additional component. If a particular probe or kit includes temperature hardware, confirm that in its own documentation rather than assuming it from the interface circuit's feature list.
Compensation also has limits. It cannot correct a dirty probe, a wrong buffer, poor grounding, a damaged cable, or a sample that is not representative. If the temperature input is missing or stale, it is better to label the reading accordingly than to imply a precision the system did not earn.
Probe care and the failure modes beginners see first
Probe care often determines the quality of a pH project more than the microcontroller code. Follow the probe maker's storage solution and cleaning instructions. Do not let a storage-sensitive probe dry out, scrape its sensing surface, or leave it coated with nutrient residue. Rinse between samples and keep calibration buffers uncontaminated. The correct maintenance schedule depends on the probe, the liquid, and how often it is used.
A rapidly moving value can be electrical rather than chemical. Atlas Scientific's datasheet warns that pumps, solenoid valves, and other probes can couple microvolt-level interference into the measurement; it describes unstable readings or values pinned near an extreme as possible signs of that problem. First test the probe away from the other equipment, then inspect grounding, cable routing, switching events, and isolation. An electrically isolated carrier or isolator is an optional external component in some builds, not a built-in property of every interface circuit.
Other common causes are an uncalibrated probe, exhausted buffers, air bubbles around the sensing area, a loose connector, a stale temperature value, or a sample that has not mixed. Change one variable at a time and keep notes. That approach is safer than repeatedly recalibrating until a desired number appears.
Limits of a small hydroponics or water-monitoring build
A logged pH value is one measurement from one location at one time. It does not identify every dissolved substance, prove that water is safe to drink, or replace a laboratory method. Nutrient solutions can be chemically complex, and a probe's stated range or resolution does not guarantee that the whole installation will achieve the same performance. Cable placement, temperature, sample mixing, calibration quality, and maintenance all affect the result.
Use the project for trends, alerts for human review, and learning how an electrochemical measurement behaves. If the data will support a regulated, medical, food, environmental-compliance, or other high-consequence decision, use an appropriate validated method and qualified review instead of relying on this hobby arrangement.
Frequently asked questions
Is a pH probe the same thing as a pH interface circuit?
No. The probe is the physical electrochemical sensor. The interface circuit conditions its high-impedance signal and communicates with the host over a protocol such as UART or I2C. A project normally needs both, plus wiring and any optional temperature or isolation hardware.
Can I connect a pH probe directly to an Arduino analogue pin?
Do not assume that you can. A pH probe produces a small, high-impedance signal that normally needs suitable signal conditioning. Use the probe maker's specified interface circuit or an appropriately designed front end, and follow its electrical limits.
How often should I calibrate a pH sensor?
There is no universal interval. Follow the probe maker's guidance and shorten the interval when the probe is used often, the sample is dirty, readings drift, or the application needs tighter control. Calibration does not replace cleaning, correct storage, or a probe-condition check.
Why does my pH reading jump when a pump turns on?
The pump or its wiring may be introducing electrical noise, especially in a sensitive electrochemical measurement. Test the probe away from the pump, check grounding and cable routing, and consider suitable electrical isolation where the circuit documentation recommends it.
Do I need a separate temperature sensor?
If you want temperature compensation, you need a reliable temperature value from a suitable sensor or a documented manual input. Whether that sensor is included depends on the specific kit or model; it should not be assumed to be part of the pH probe or interface circuit.
About the image
AI-generated editorial illustration; not an actual product or mission photograph.
Source notes
Reporting record
techduopulse stores source destinations privately. Public notes remain non-clickable so every visitor journey stays on this website.
Source note: Atlas Scientific EZO pH Circuit product documentation
Primary source · pH measurement scope; UART and I2C protocols; 3.3–5 V operating range; one-, two-, and three-point calibration; temperature compensation; default I2C address; supported probe…Source note: Atlas Scientific EZO pH Circuit datasheet
Primary source · High-impedance pH measurement; single and continuous readings; calibration commands; temperature-compensation command; electrical-noise explanation; recommendation for…Source note: Atlas Scientific Raspberry Pi sample-code guide
Primary source · USB, I2C, and UART interaction modes for EZO-class circuits; Raspberry Pi setup and interface examples; model-specific UART compatibility cautionSource note: Atlas Scientific EZO pH wiring diagram
Primary source · Power, ground, probe, and host-interface wiring reference; exact pinout should be checked against the circuit revisionNew India-facing beginner article for the uncovered application query. Separates the physical electrochemical pH probe from the embedded signal-conditioning and communications circuit; explains Arduino/Raspberry Pi UART and I2C logging, calibration records, temperature compensation inputs, probe care, electrical-noise diagnosis, optional isolation, and non-compliance limitations. Claims are restricted to supplied Atlas Scientific product documentation, datasheet, wiring diagram, and Raspberry Pi guide.